
Use This Yoga Sequence to Safely Prepare Your Body for Lotus Pose

Lotus Pose (Padmasana) is a bit of a deceptive pose. It looks a lot like its sister pose, Easy Pose (Sukhasana), but in practice, it’s more demanding on the body.
There’s a lot at work required in your hips and legs to get into Lotus Pose. Your hip flexors, hamstrings, external rotators, glutes, IT band, adductors, and abductors all play a part in creating stability and openness to access this pose.
To reach full Lotus Pose, you need to externally rotate your legs at the hip joint, bend your knees fully, and then draw your feet into the groin and up toward your hip flexors. To say the least, Padmasana can be challenging.
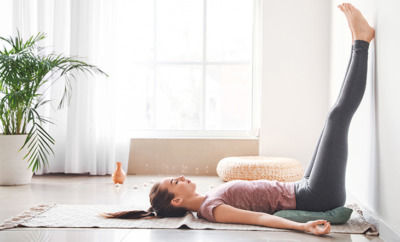
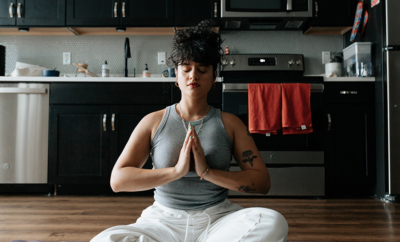
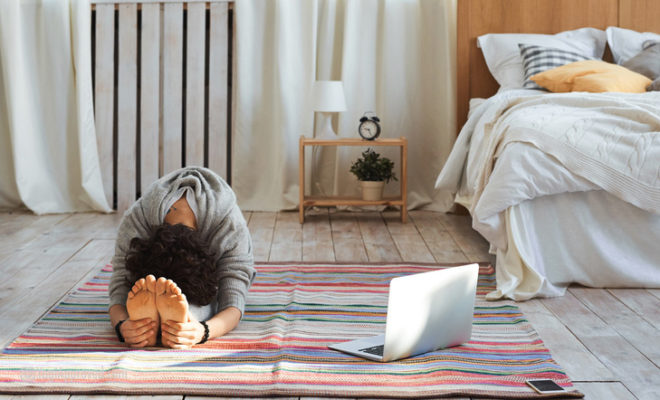
When Your Body Is Ready for Lotus Pose, Add This Meditation Practice For A Heart-Opening Experience
This meditation on YA Classes is packed with soulful affirmations that invite you to lead from the heart and own your full self. When we make a habit of returning to gratitude, no matter what, we become magnetic to all our soul’s desires. Safely warm up your body for Lotus Pose and then tune into this beautiful meditation.
Use This Sequence to Safely Prepare Your Body for Lotus Pose (Padmasana):
Start your practice in Easy Seat with two to three minutes of breath work followed by two to three rounds of both Sun Salutation A and B. Then complete this sequence to work toward Lotus Pose in the order provided and hold each pose for eight to 10 full breaths.
Need some help with your Sun Sals? Take this Sun Salutation Flow for Beginners (Free Class)
1. Low Lunge (Anjaneyasana) With Quad Stretch

Low Lunge warms the hips and opens the hip flexors. Adding the quad stretch will prepare the knees for the deep flex needed in Lotus Pose.
Let’s try it:
- From Down Dog (Adho Mukha Svanasana) bring your right foot forward, placing it between your hands
- Bend into your right knee, keeping your knee in line with your ankle
- Lower your left knee down to the ground
- Bring your hands up to your right quad while lifting your chest until your shoulders stack over your hips
- Shift your weight forward slightly feeling a stretch across your left hip flexor
- Engage your core and lengthen through your tailbone
- Sweep your left arm back as you bend your left leg, sending your ankle toward your glute
- Bind your left foot with your left hand
- If you twisted open while grabbing your foot, re-align your shoulders squaring them to the front
2. Revolved Triangle (Parivrtta Trikonasana)
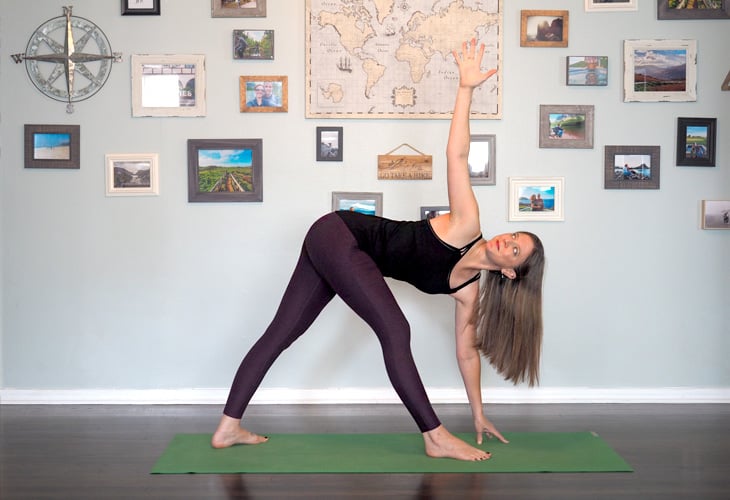
Revolved Triangle strengthens and stretches the hamstrings, hip abductors, and IT band preparing several necessary muscles for Padmasana.
Let’s try it:
- From Low Lunge, straighten both legs and shorten your stance as needed
- Externally rotate your left leg slightly at the hip joint and place your foot on the mat at a 45- to 60-degree angle
- Keep your right toes facing forward
- On your inhale, reach your arms up overhead
- On your exhale, hinge at your hips, folding forward with a flat back
- Place your hands on the ground or blocks
- Lengthen your spine from the crown of your head to your tailbone
- Bend your right arm and place your right hand flat on your lower back
- Keep your left hand on the ground or block while you twist from your waist through your whole spine rotating your right ribs up toward the ceiling
- Using your hand on your lower back, make sure that your hips stay neutral
- Shift your weight forward or back between your feet until your hips are even
- When ready, extend your right arm toward the sky
- You have the option to bring your left hand across your right leg, placing it on the ground outside your right foot to deepen the stretch
Looking for more yoga tutorials and yoga tips? Check out our full library of Yoga articles here
3. Figure-4 Chair (Eka Pada Utkatasana)

This pose it will challenge your balance, stretch your outer hips and glutes, and warm your quads to prepare for Lotus Pose.
Let’s try it:
- Unwind from Revolved Triangle
- Shift your weight onto your right leg and come to stand on your right foot, lifting your left knee in front of you to 90 degrees
- Externally rotate your left leg at the hip joint and cross your left ankle over your right thigh just above your knee
- Flex your left foot so both legs stay active
- Bend your right knee as if sitting down in a chair
- Lift through your chest and bring your hands to heart center
- Use your core and gaze to find balance in the pose
4. Half Bound Lotus Standing Forward Fold (Ardha Baddha Padmottanasana)

Practice this pose to increase flexibility in your knee and hip and increase your overall balance and focus as you prepare for Lotus Pose.
Let’s try it:
- From Figure-4 Chair, straighten your right leg and lift your left leg up toward your chest
- Grab your left foot in your right hand and slowly guide it toward your right hip, placing it as high up on your hip as you can
- Allow your left knee to drop until it is in line with your right knee
- Inhale and extend your left arm in front of you
- Exhale and sweep it behind your back
- Grab your left foot with your left hand, on the outside of your right hip. You can also grab your right arm if you can’t quite reach your foot
- Once stable here, inhale and lengthen through your spine
- Exhale and hinge forward at your hips
- Place your right hand on the ground to help with balance
- After holding the pose, lift your torso and slowly release your leg
5. Goddess Squat (Utkata Konasana)

Goddess Pose will fire up your external hip rotators and quads, awaken your abductors, and stretch your adductors and inner thighs. This simple pose does a lot to prepare you for Padmasana.
Let’s try it:
- From standing, take a large step back with your right leg and turn to face the long side of your mat
- Externally rotate your legs at the hip joint so that your heels are in and your toes are out
- Bend your knees deeply, lowering your hips until your thighs are parallel to the floor
- Lengthen through your spine and engage your core
- Play around with your arm placement and find one that feels challenging and sustainable
Tight Hips? Practice These 5 Hip Opening Yoga Poses to Melt Away Hip Pain
6. Repeat on the Opposite Side
Of course, you want to create balance as you work toward Lotus Pose. So, repeat all of the above poses on your left side before transitioning to seated asanas.
7. Head-to-Knee Pose (Janu Sirasana)
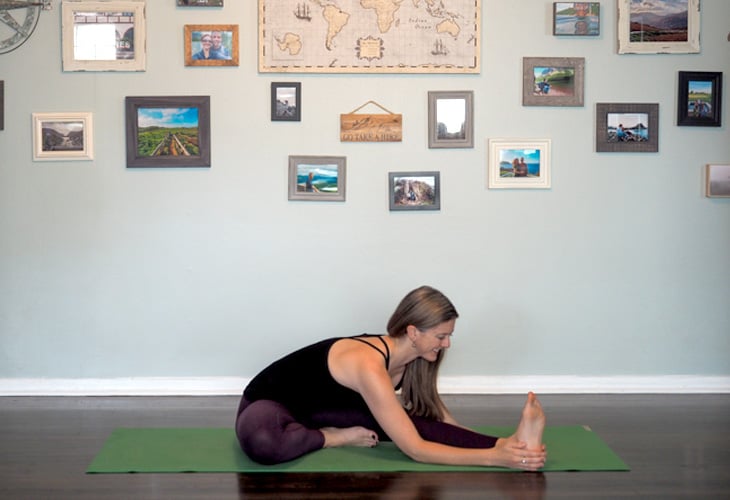
Practice Janu Sirsasana for one final hamstring and groin stretch before trying Lotus Pose.
Let’s try it:
- Sit with your legs extended in front of you
- Bend your left leg and bring the sole of your left foot to the inside of your right thigh
- Drop your left knee toward the ground
- Keep your hips and shoulders square
- Inhale and lengthen through your spine
- Exhale and fold over your extended right leg, bending at the groin rather than the waist or hips
- You can place your hands on either side of your leg, put your elbows on the ground, or grab your extended foot
- Repeat on the other side
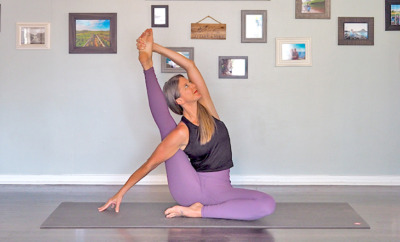
8. Lotus Pose (Padmasana)

After working toward Padmasana, it’s time to give it a try. Remember that this position requires extreme mobility, so do not push past your boundaries at any time.
Let’s try it:
- Sit with your legs extended in front of you
- Bend your right leg and cradle it up toward your chest for a moment
- Use your hands to place your right foot as high as you can on your left hip crease
- Repeat this with your left leg, crossing it on top of your right leg
- The soles of both of your feet will be facing up
- Ease both knees toward the ground as your body allows
- Distribute your weight evenly across your sit bones, and lengthen through your spine
- Place your hands on your knees with your palms facing up or take a mudra
- Release any tension you may be holding in your shoulders, neck, or head
- Unwind from your pose the way you came in, and repeat on the other side
Need some mudra inspiration for Lotus Pose? Here are 9 Powerful Mudras to Add to Your Yoga and Meditation Practice
The Takeaway on Padmasana: Lotus Pose Isn’t for Everyone
Depending on the anatomy of your pelvic bone and the range of motion available in your hip sockets, Lotus Pose may be the easiest pose you’ve ever done, or one that you simply can’t get into even with proper warm-up and sequencing.
Lotus Pose is often utilized for breathwork or meditation. However, if you find that Lotus Pose creates discomfort in your hips, ankles, knees, or anywhere else in your body then stick with Easy Pose for your subtle practices.
There are no brownie points for doing meditation in Lotus Pose versus any other seated position!
Keep in mind, asana practice is just that – practice. There’s no need for comparison, and no yoga superpowers bestowed for reaching an “advanced” pose like Padmasana.
Want more support to practice Padmasana? Practice These 4 Yoga Poses to Prepare You For Full Lotus Pose (Photo Tutorial)
This article has been read 3K+ times. Feelin’ the love!

Don't Miss These


This Month's Letter
From the Editor
Monthly motivation and food for
thought from our founder.


Comments